Wednesday, 31 December 2008

Upgrading MSI Wind To The 1.0A BIOS

I am the proud owner of a MSI Wind U90 Notebook :)
A few nights ago I decided to check out the MSI Wind forum, and I was amazed at how many hacks and tweaks you can do to it! I noticed a lot of talk about upgrading the BIOS to improve performance, so that's the first thing I have decided to do to my notebook.

There are many different ways in which you can upgrade your BIOS, but I found this to be the best way for me. Of course, you will be able to use this method for any type of notebook, and for any type of BIOS. Before I continue, upgrading your BIOS can be dangerous, so please, only follow these steps if you are comfortable with what you are doing. It will not be my fault if it all goes wrong!

So, this is how I upgraded the BIOS.

1. Create new FAT16 partition
2. Install FreeDOS
3. Copy over BIOS files
4. Flash!


So, to begin with, you will need to create a new partition on your hard drive. The easiest way to do this is to boot your notebook up in LiveCD mode. Check out this post to see how to do this from a USB stick: http://jamsubuntu.blogspot.com/2008/10/msi-wind-mini-notebook.html. Note: you will only need to follow the first few steps.

Once you can see the desktop, you are ready to go!
System -> Administration -> Partition Editor
If you are unsure on how to use Partition Editor, please leave a comment saying, and I will add instructions on how to do the following steps
Now before I could add a new partition, I had to shrink the main partition that I had on. Once shrunk, I created a new partition (about 25Mb in size... although to be fair, you could get away with a 5Mb partition). I then formatted this partition in FAT16.

Now that you have your new partition on, you will need to install FreeDOS. (It's best if you reboot your PC, and login as normal for this).
Before we can begin to install FreeDOS, we will have to mount the partition:
sudo mkdir /mnt/freedos
mount /dev/sdaX /mnt/freedos

*Replace X in sdaX with the correct number that applies to you
Now to download and install FreeDOS:
cd /mnt/freedos
sudo -i
wget http://odin.fdos.org/fdodin06.bin.zip
unzip fdodin06.bin.zip fdodin06.144
rm -f fdodin06.bin.zip
cp /usr/lib/syslinux/memdisk .

* Note on the last command the '.' at the end - this isn't an error.

Now that FreeDOS has been installed on the partition that we have created for it, we must edit the Grub list to show this partition in. To do this:
sudo gedit /boot/grub/menu.lst

Once opened, you will need to add the following lines to the bottom of the file:
root (hd0,X)
title FreeDOS
kernel /memdisk
initrd /fdodin06.144


* replace X with the correct number for your MSI Wind. Remember, 0 counts as the first partition. So if your FreeDOS partition is at sda4, the X would be 3.

We now have the ability to boot up the FreeDOS partition! The next thing we need to do is to download the BIOS files:
cd /mnt/freedos
sudo -i
wget http://download1.msi.com.tw/files/downloads/bos_exe/n011_10a.zip
unzip n011_10a.zip
rm n011_10a.zip


Now you are ready to reboot your laptop. As the Grub is loading, press ESC, and choose the FreeDOS option. You will soon be at the FreeDOS start screen, prompted with A:\. To upgrade the BIOS, make sure that you have your Power lead connected - as a sudden power loss at this time could cause damage to your notebook. Once all set to go, type the following:
C:
flash.bat

Let the batch file do it's job, and once complete, you are ready to power of your notebook. Once turned off, disconnect the power lead, and the battery. Once disconnected for 20 seconds, reconnect, and boot up your MSI Wind.
Press DEL to enter the BIOS settings, and load the default settings, and save and exit. You now have the new 10A BIOS!

I would like to thank the user Domo on http://forums.msiwind.net

Goodbye Rhythmbox, Welcome Songbird!

Although I don't like to admit it, I have always liked the iTunes media player. I know it hogs so much RAM, and that it loves to crash half way through your most loved song - but it is so sexy. I wasn't too keen on the idea of installing and running it through Wine, as it would only use even more RAM then before. I settled for Ryhthmbox in the end, even though it didn't really compare at all to iTunes. I finally had enough of its uglyness this evening, and went on the search to find a better alternative. After a bit of Googling,I had found it!

Songbird is far from just your normal media player. As well as having the ability to play your normal music, it has an integrated web browser, integrated Last.fm support and many different skins and plug-ins.


Songbird
Image From: http://www.getsongbird


So what are you waiting for? Run the following command to download it:
wget http://download.songbirdnest.com/installer/linux/i686/Songbird_1.0.0-860_linux-i686.tar.gz

Now to unpack it:
tar zxvf Song*.tar.gz

Now we will want to move the icon png image to a different location. You can chose a different location from me if you wish:
cd Songbird
sudo mv songbird.png /usr/share/pixmaps

Rather then having more folders and files cluttering up my home folder, I decided to move the folder to /opt. To do this, run the following command:
cd ..
sudo mv Songbird/ /opt/

The only problem now is that you will have to be root to launch the application. To get around this problem, you will need to change the ownership of the files:
cd /opt
sudo chown -hR username Songbird

*Change username for your username!
You can now run the application by using the following command:
/opt/Songbird/songbird


Rather then having to type that command out every time to launch it, you can add the application to the menu. To do this, right click on your menu -> Edit Menu. Now choose which section you wish to place it - I chose Sound & Video, Then chose New Item. Use the following details in the pop-up window:

Name: Songbird
Command: /opt/Songbird/songbird
Comment: Thanks jamsubuntu.blogspot.com!

To change the icon, click on the image in the top left, and navigate to where you original moved the Songbird icon (/usr/share/pixmaps). When you have found the icon you wish to use, simply click on it to replace it with the default icon. Click OK to complete it.

Sunday, 28 December 2008

The Best Pidgin Hacks & Mods

Pidgin is a cross platform chat client which is both free, and easy to use. You can connect to many different networks at the same time. PidginPidgin supports all the major chat networks like AIM, MSN, Yahoo, and also supports a lot of the less well used networks like Myspace, Google Talk & Zephr. Pidgin now also has the support for IRC chat rooms. With a few of these little tweaks and hacks below, it will allow your Pidgin to support a number of different protocols & become the ultimate application for your Ubuntu

Facebook Protocol
Facebook
This plugin allows you to connect to the Facebook Chat service. Currently the plugin allows you to login, view your buddy list, send & receive messages, add & remove friends, receive notifications, search for Facebook new friends and set your Facebook status!

To download and install this plugin, use the following command:
wget http://pidgin-facebookchat.googlecode.com/files/pidgin-facebookchat-1.45.deb && sudo dpkg -i pidgin-facebookchat-1.45.deb

Once installed, you will need to restart Pidgin. To add your Facebook account, goto Accounts -> Manage Accounts -> Add -> Facebook Chat


---------------

Frost Wire IRC Chat
Frostwire
As many of you may know, Frost Wire is the P2P application to have with your Ubuntu distribution. [Post On Downloading, Installing & Using Frost Wire coming soon!] To connect to the built in IRC chat function from within Pidgin, Accounts -> Manage Accounts -> Add - > IRC.
Your user name will be name that you want other people to see you as (In my case, HomeMadeJam). For the server, you will want to use the following: chat.peercommons.net.


---------------

Twitter
twitter Yes, you can even update your twitter account from within Pidgin! To do this, you will need to add a set of repositories to your /etc/apt/sources.list file.
sudo gedit /etc/apt/sources.list

And add the following if you are using Intrepid :
deb http://ppa.launchpad.net/sugree/ubuntu intrepid main
deb-src http://ppa.launchpad.net/sugree/ubuntu intrepid main

or the following for Hardy:
deb http://ppa.launchpad.net/sugree/ubuntu hardy main
deb-src http://ppa.launchpad.net/sugree/ubuntu hardy main

Now we need to update, and install the pidgin-microblog package:
sudo apt-get update && sudo apt-get install pidgin-microblog

After this has installed, restart Pidgin in order for the changes to take effect.
To add a new account: Accounts -> Manage Accounts -> Add


---------------

Pidgin Plugin Pack
The plugin pack offers 30 new plugins that are available for Pidgin. Some of the best plugins are:
Album - Gives the ability to save all your contact's avatars.
Auto Reply - Gives the ability to have an auto reply function to all protocols
Last Seen - Records when a contact was last seen
To install:
sudo apt-get install pidgin-plugin-pack

You will need to restart Pidgin before the effects take place


---------------

LibNotify Package
This is a handy little plugin that allows a little pop up window to appear when a user signs on or offline. (A lot like the Windows MSN does)
To install
sudo apt-get install pidgin-libnotify

To enable, you will need to restart your Pidgin, and then Tools -> Plugins, and enable it there.


---------------

GTK Themes
I have seen many of people across the Internet looking around the Internet for Pidgin themes. I can understand why people would dislike the default look of the Pidgin interface. Personally I like it, But for the people that don't: did you know that you can change the looks of it using a simple plugin?

If you have installed the Pidgin Plugin-Pack above, you will have everything that you need to do this. Under the Plugins window (Tools -> Plugin) enable the plugin Pidgin GTK+ Theme Control Once enabled, click the configure button at the bottom of the window. From this new Window that appears, you will be able to change the color of many things like the cursor, text, hyper-links etc. It also gives you the ability to change the font of the contact window (as the default is a little hard to read at times)


---------------

Extra Smiley Themes
Smileys
To install extra smiley themes, run the following command:
sudo apt-get install pidgin-themes

After restarting your Pidgin, you will be able to select these new themes by:
Tools -> Preferences -> Smiley Themes


If you have any other plugins, hacks or tweaks that you would like to see here, please leave a comment, and I will gladly add them to this list.

Wednesday, 24 December 2008

Xmas Xsnow!

Merry Christmas to all of my readers!
I have been really busy getting everything ready for tomorrow, as I am sure all of you have been. So something short just to get you that extra 1% ready for Christmas!
sudo apt-get install xsnow

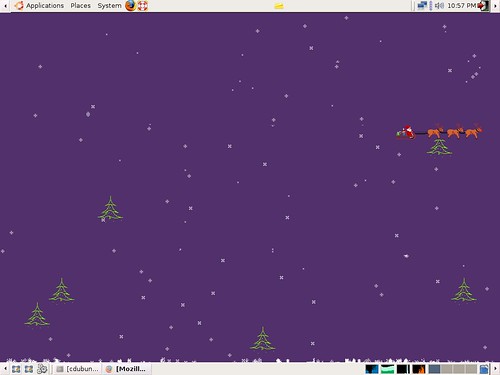
xsnow is a fun little application that draws snow flakes, trees and a Santa that travels across your screen! To run it, simply type in: xsnow into the terminal, and view your desktop :)


xsnow
Image from: http://www.flickr.com


Hope you all have a wonderful day!

Tuesday, 23 December 2008

Installing & Using Adobe Air

Adobe AIR is a cross-operating system runtime that enables web developers to use their existing web development skills, code and tools to build and deploy rich web applications and content to the desktop.From: http://onair.adobe.com/air

To download Adobe Air, use the following command to download the .bin file from the official website:
wget http://airdownload.adobe.com/air/lin/download/1.5.2/AdobeAIRInstaller.bin


Before we can begin to install it, we need to apply the right permissions to it. Once that is done, we can then begin to install:
chmod +x AdobeAIRInstaller.bin
./AdobeAIRInstaller.bin

Once installed, you are ready to go!

Sunday, 21 December 2008

Installing & Using Winetricks

Winetricks is a quick and simple way of installing a number of different Windows Runtime Libraries that are often needed to run Windows applications within Wine.

To download Winetricks, you can find the package here: http://www.kegel.com/wine/winetricks [Right Click - Save As]
or download it using the following command:
wget http://www.kegel.com/wine/winetricks


Once downloaded, you can run the program by:
sh winetricks

Or you can install it by changing the permissions on it, and moving it to the /usr/local/bin directory:
chmod +x winetricks && sudo mv winetricks /usr/local/bin

You will now be able to run the application by just typing in winetricks

When running the command from the terminal, a graphical user interface will appear for you to select what libraries it is that you want to install. If you know what libraries it is that you need installing, then you can run a command like the following to speed things up a little:
winetricks corefonts


If you have any problems whilst running this application, then please do leave a comment :)

Saturday, 20 December 2008

Install The Ubuntu Title Font

This font can come in great use if you are wanting to make a banner or an image for one of your blogs or forums. To download, it is as simple as running the following command:
sudo apt-get install ttf-ubuntu-title

The below image is what the font looks like:


Ubuntu font
Image From: http://www.betatype.com